After 10 hours of YouTube videos, I finally felt I had enough understanding to attempt changing out the brake shoes on the Subie without outside help. They had been squeaking for a few weeks now and I was very happy to discover it was not something worse. So...Let us begin.
 |
| Remove/lift caliper |
You may be "surprised" to discover how easy it actually is.( I know I was!) I have heard that even an idiot can do them...and being one of those myself, I guess I can now believe it.
 |
| 14 mm works nicely |
 |
| Pry off old shoes and hardware |
We ordered the shoes on Amazon.com. Along with a brake tool and a small tube of silicone grease.
 |
| Hmm, A little rusty. |
The old shoes practically fell apart in my hands. As you might be able to see, there was not much left on one of the sides.
 |
| Old shoes. Note: Uneven wear. |
The passenger side job went so easy, I decided to do the drivers side next. Mostly because I heard that they should be done in pairs and the shoes I purchased happened to have them included.
 |
| Practically falling apart. Lets get the new ones! |
It simply would not be a blog post if things went completely perfect. That is right.... after all of those YouTube videos walking me though the process....I hit a snag.
 |
| Shiny and new! |
 |
| Replace hardware |
 |
| Replace shoes |
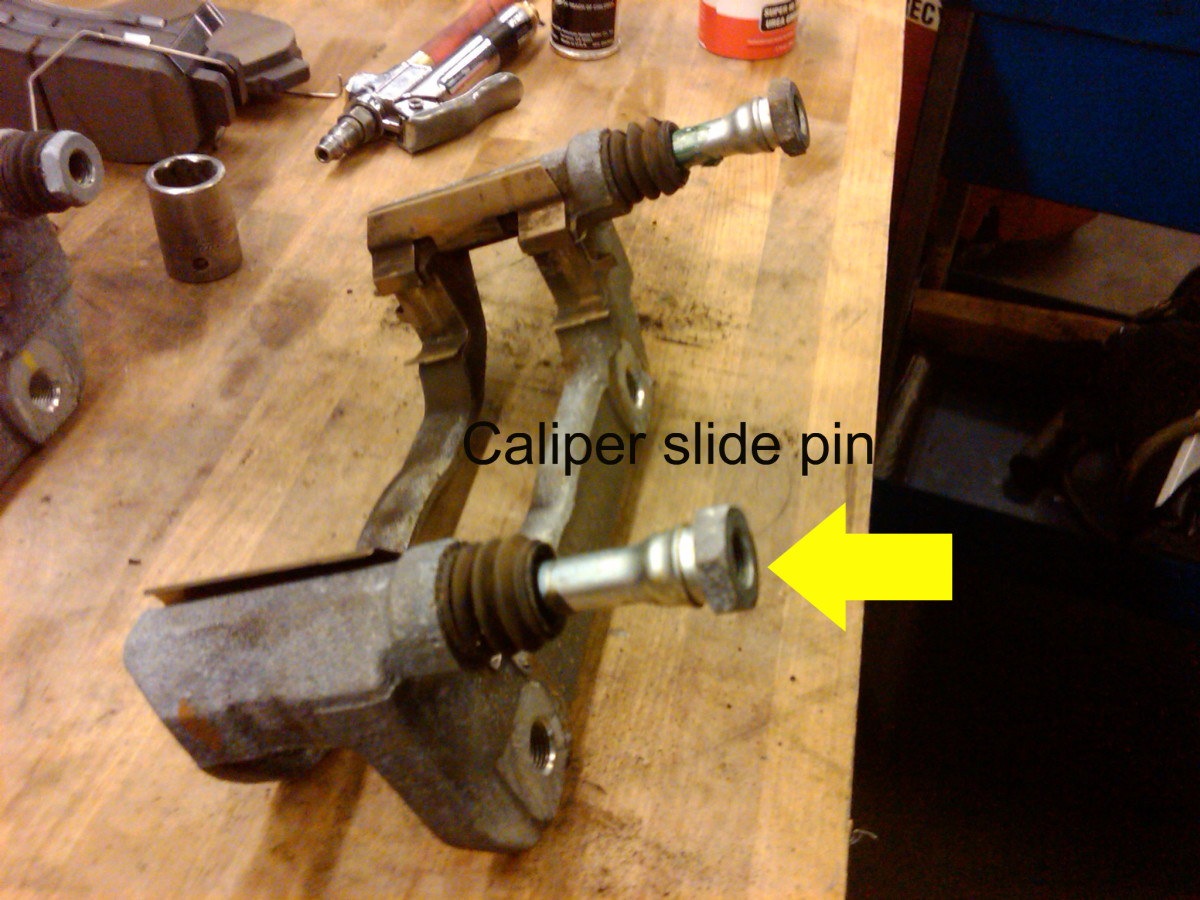
The slider guides on the drivers side were ( and still ARE!) completely totally frozen in place. Just to clarify: they SHOULD slide back and forth whenever you step on the brakes; allowing your shoes to press against the rotor evenly. This one does not. Instead, it presses against the inside shoe and grinds it to dust.
 |
| Fold and tighten caliper..DONE! Easy! |
I debated whether I should grab my biggest hammer and, with my best and loudest Hulk voice, "BASH IT!"
 but cooler heads prevailed and I was able to finally assemble it back together. At least I have brakes, Although I had to reuse the outside old one because it was the only one that fit.
So looks like I will be limping along until I replace the caliper holding bracket with new sliding rods. I'll probably have to replace the rotors on the passenger side as well. Luckily, they are not too expensive. ( under $30.) But there is always the risk that I could encounter another frozen bolt somewhere.
I was so proud that I completed the passenger side too. Bummer that the driver side had to throw a wrench into the job. ( pun intended)
Tomorrow is the last day I have to train and qualify for the Tennessee Pearson project. It is proving to be a challenge and I'm not sure if I will be able to qualify for this one. My goal is to at least make it long enough to earn enough money to replace that caliper bracket. ( $30!) Luckily there is free shipping on Amazon Prime.
I guess it is possible that I could actually qualify despite my reservations, but even if I did, the project is only meant to last a week or so. Not to mention I may not feel much like scoring after a full 8 hours at Collegeboard. We shall see how things go


No comments:
Post a Comment